
Nexus Repository is a universal repository manager that serves as a central hub for storing, managing, and distributing software artifacts, such as libraries, dependencies, and build outputs. They are your organization’s system of record or library of software, from compiled code to container images, to third-party software. It is a critical component in modern software development and DevOps practices because it provides a single, controlled source of truth for all components used in a project.
source: https://help.sonatype.com/en/product-information.html
Installation Type: Binary, Systemd, Container, Openshift Operator
Requirements:
| Profile Size | Profile Description | CPUs | RAM | Local Blob Storage |
|---|---|---|---|---|
| Small | 20,000 requests/hour 200,000 requests/day embedded H2 database | 2 | 8GB | 20GB |
| Medium | 100,000 requests/hour 1,000,000 requests/day external PostgreSQL database | 4 | 8GB | 200GB |
| Large | 1,000,000 requests/hour 10,000,000 requests/day external PostgreSQL database High Availability deployment | 4 per node | 16GB per node | 200GB or more |
| Very Large | 2,000,000 requests/hour 20,000,000 requests/day external PostgreSQL database High Availability deployment | 8 per node | 32GB per node | 10TB or more |
Sample Installation via systemd:
- Download Binary via https://help.sonatype.com/en/download-archives—repository-manager-3.html#download-archives—sonatype-nexus-repository-3
- Install Java runtime based on the Nexus repo version, if require java 21, install Java 21
- Extract downloaded Nexus binary
- Create file nexus.service under /etc/systemd/system
- Make sure exec start and stop are directed to the path when you extract the Nexus binary and add start and stop arguments in exec
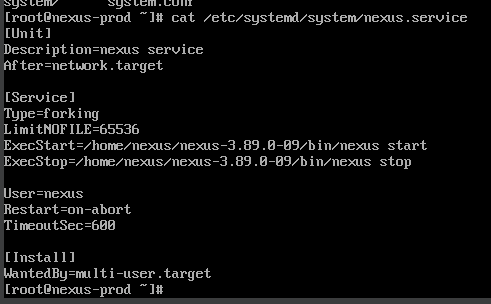
- Run systemctl start nexus to begin the Nexus service
- For a detailed log, you can tail -f or cat /path/to/nexus/sonatype-work/nexus3/log/nexus.log
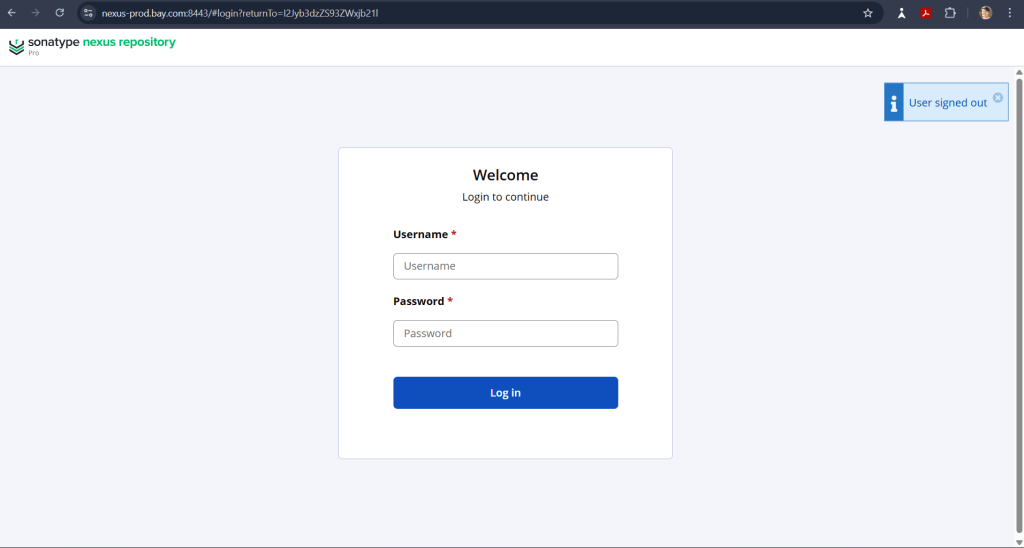
- Now you can access the Nexus repo via browser
- Note! The default admin password will be stored under sonatype-work directory
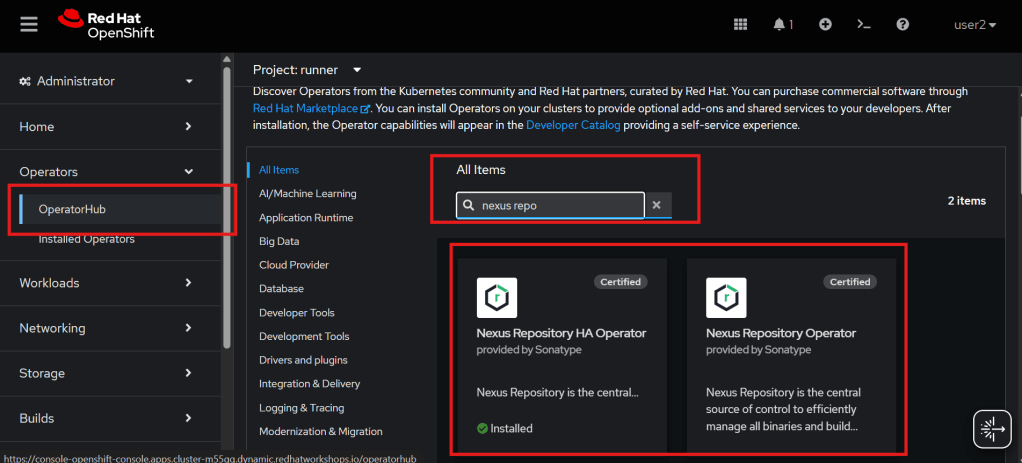
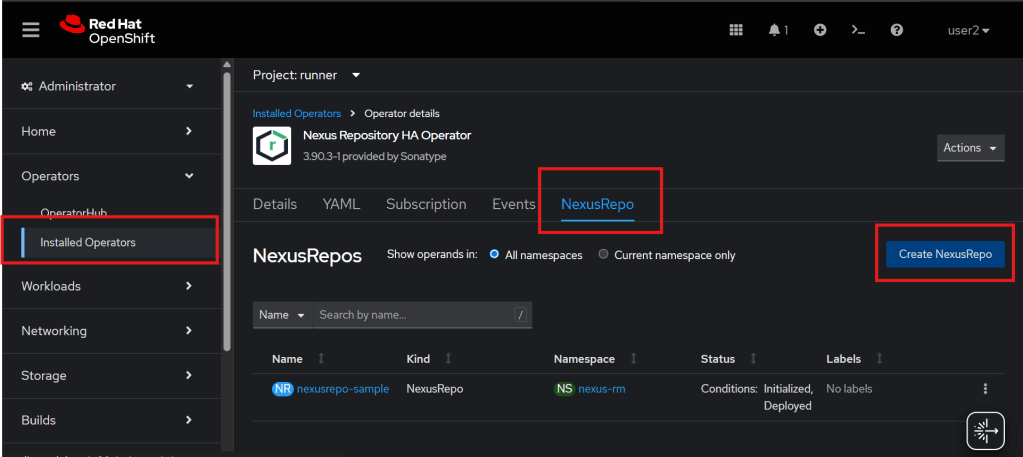
Install Nexus Repository as Openshift operator
First, go to the OpenShift console in administrator mode, Operators>OperatorsHub, and search for Nexus repo. You can choose HA or single.
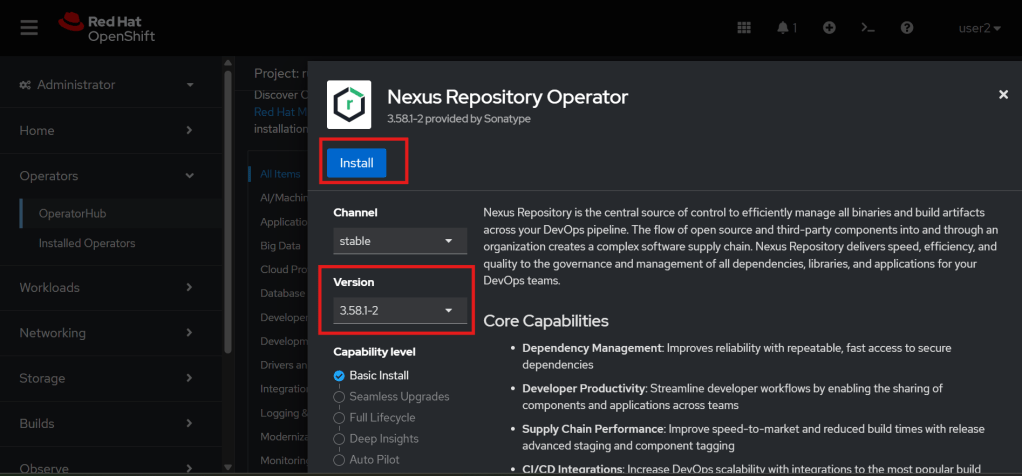
Click on the operator and choose the version you would like, and install. Note! Version provided by Sonatype, we can’t install a specific version which not stored on the Openshift OperatorHub.
After the operator is installed, we can create a Nexus instance by click create nexus repo on Installed Operators>NexusRepo>Create NexusRepo.
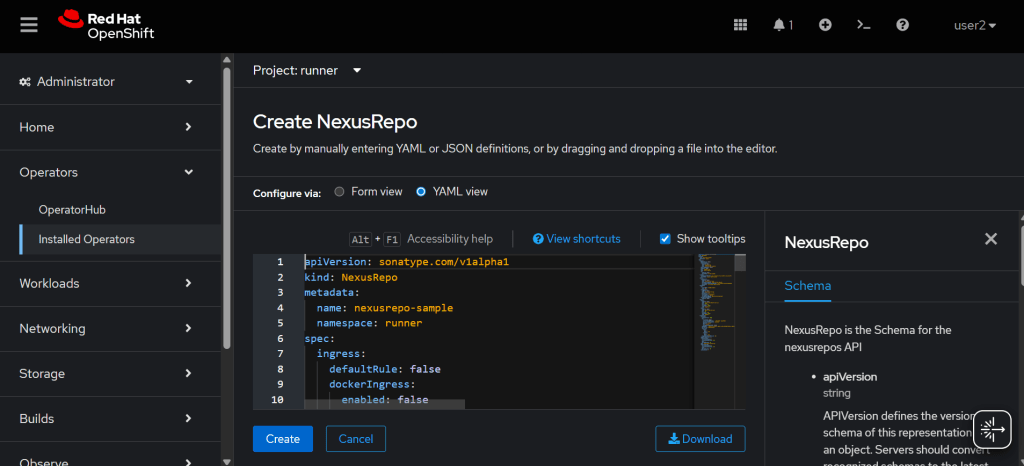
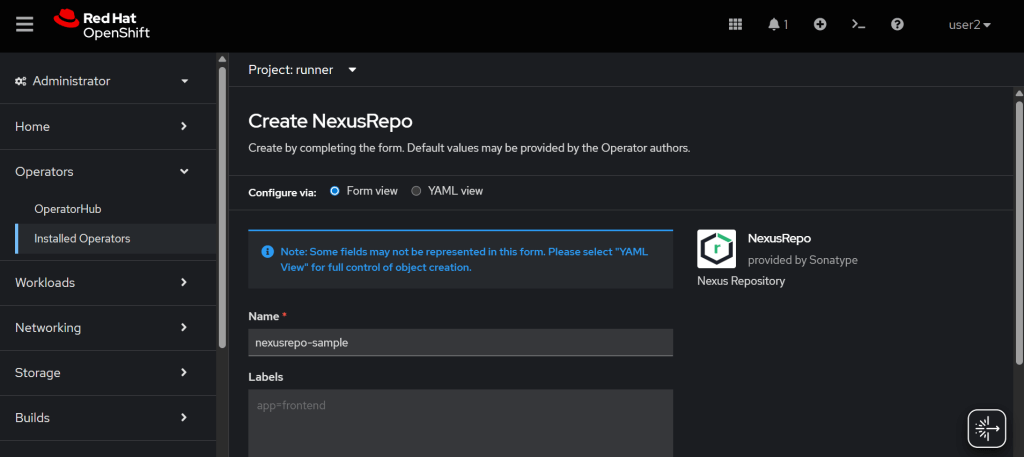
You can create an instance by filling the form or by a YAML file with custom configuration.
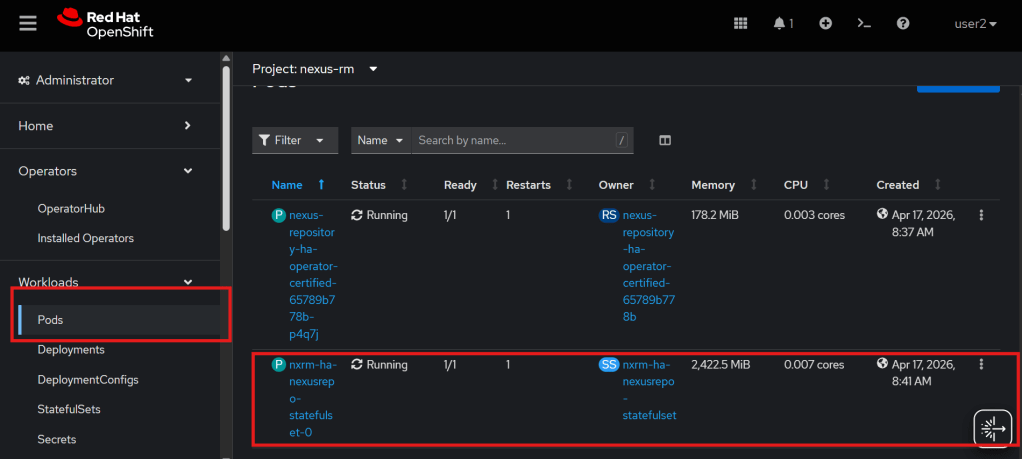
After create new instance, nexus pod will be spawn.
We can expose Nexus by creating a service and a route.
Example service yaml, for docker port is my custom configuration, which is the port will open as http inside the container when we create a new docker repository with an http connector and exposed by route as https, so we don’t need to set up jetty-https.xml for creating https connector.
kind: Service
apiVersion: v1
metadata:
  name: nexus
  namespace: nexus-rm
spec:
  ports:
    - name: http #default port to expose nexus web server
      protocol: TCP
      port: 8081
      targetPort: 8081
    - name: docker-proxy #this port will be open on http inside container
      protocol: TCP
      port: 5001
      targetPort: 5001
    - name: docker-group #this port will be open on http inside container
      protocol: TCP
      port: 5002
      targetPort: 5002
    - name: docker-hosted #this port will be open on http inside container
      protocol: TCP
      port: 5003
      targetPort: 5003
  selector:
    app: nxrm #configuration for service to select new spawn nexus pod
Example Nexus Route: block red to expose the Docker route to the service before the port http connector inside the container, block yellow to expose the service to the Nexus web server. Note! The host location should be set to the base domain, the same as the OpenShift base domain, e.g., nexus-abc.apps.ocpcluster.com.
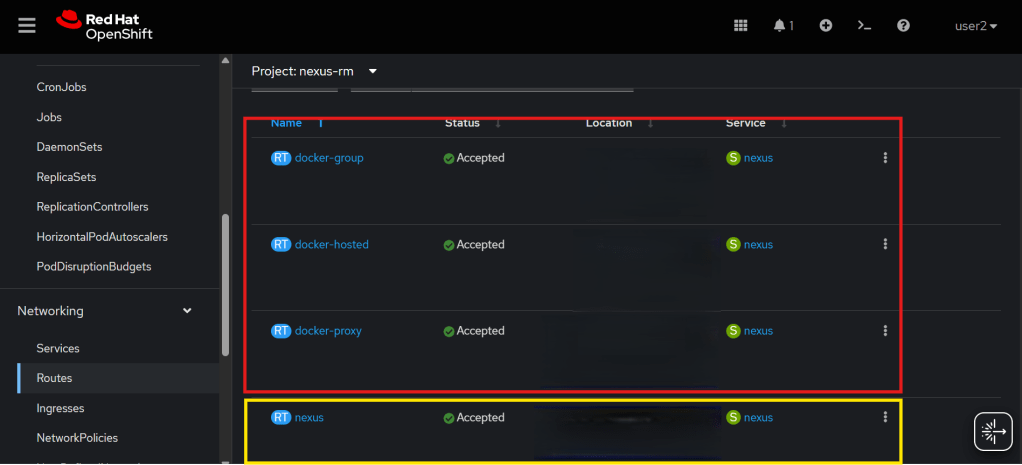
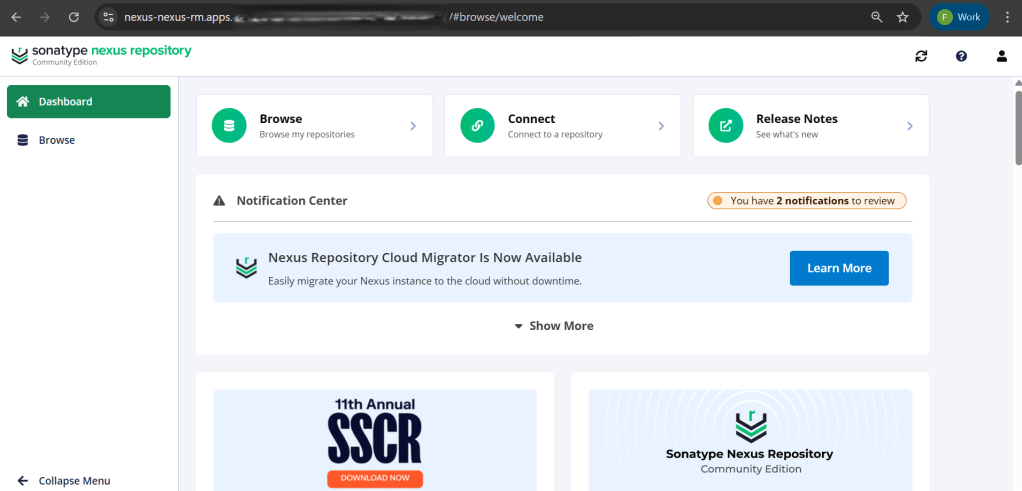
Click host of nexus webserver route will be direct to nexus web console.
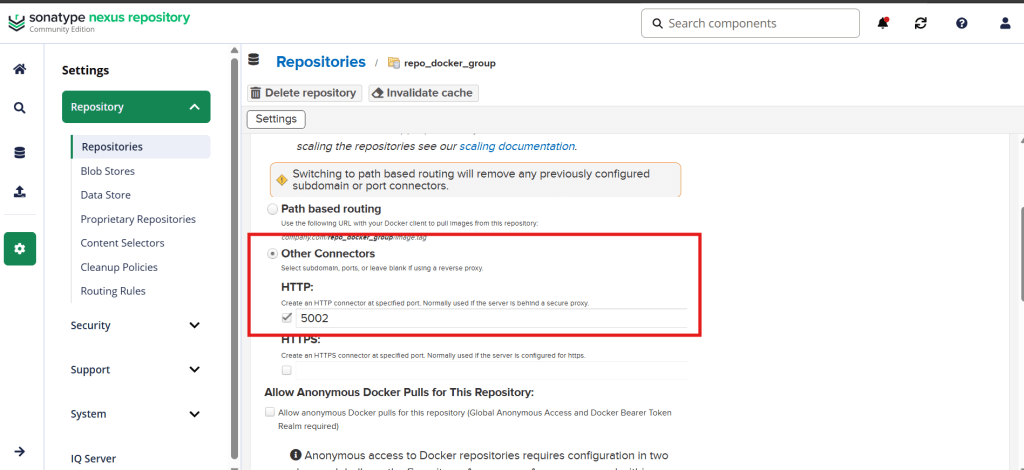
Log in as admin, default credentials will be stored on secrets, and create a new Docker repository and add an HTTP connector, same as the port we open on step create service before.
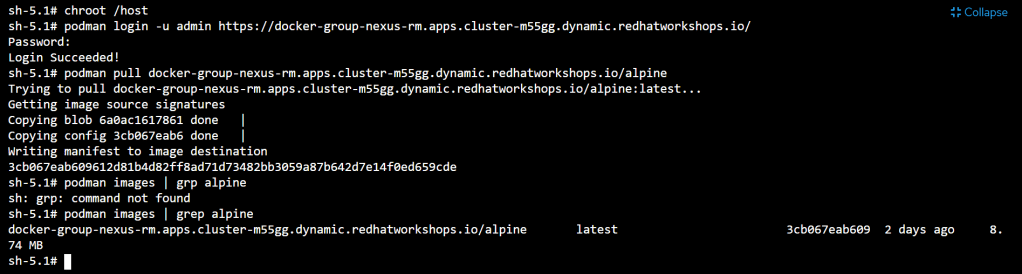
Test pull image via route docker.

Tinggalkan komentar